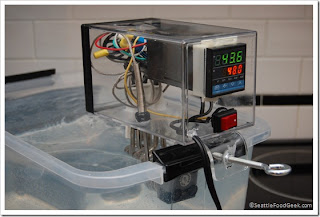
I've seen a fair number of DIY Sous Vide setups and I was inspired to build my own. I found a number of builds through instructables and other sites and settled on building an immersion circulator design due to the versatility. The setups I decided to base my design off were all-in-one type units designed to emulate laboratory circulators (usually between $1000 and $2000) but significantly cheaper. The design used by Seattle Food Geek is a great example of one of these builds. Some variants split out the temperature controller from the heater/circulator which is what I decided to do with mine.
What I liked about these builds:
-Readily available parts
-Inexpensive to build
-Some attention to safety (GFCI outlets recommended)
-Good electrical designs
What I did not like:
-GFCI outlets often integrated but no fuse
-all-in-one builds perched over a bath of water
-split controller builds used awkward setups to hold heaters
-mounting components to keep the entire build out of the water were glued in place
The lack of a fuse on the majority of the builds I've seen is rather concerning, especially when GFCI outlets are being suggested as a safety feature. I usually operate my system either in a kitchen or bathroom (easy access to water to fill) and both of these rooms have GFCI outlets already in place, so I opted for a more compact single outlet. It seems other builders have had very good luck with their all-in-one setups but I just feel uneasy having my entire controller sitting above a tub of water. Also, having my controller modular means I can use the same controller to run a rice cooker for smaller batches or higher temperatures (my circulator pump has a safety shutoff if the bath gets too far above 160F)
With the modular controller, I still wanted to use a circulator design rather than drive a rice cooker or other appliance. I didn't really like how most of the heater assemblies looked and I hadn't yet found the bucket heaters that some such projects used. I decided to use PVC pipe to hold 3 heater coils in place and provide a mounting point for the circulator pump. By drilling holes to fit the heater bases snugly, I was able to then cut the pipe and pressure fit the heaters in place with an end cap and a pipe coupler. This keeps the heaters in place tight and and means that if a heater fails, I can take the assembly apart and replace one heater without removing and replacing glue.
My system does have one major problem in the heater/circulator design. The fountain pumps often used for circulators aren't designed for high temperature use. In practice, the pump that I use has a thermal safety shutoff somewhere between 160F and 165F This isn't a problem for most of my recipes, as meats generally come out best between 130F and 150F and fish works well even lower. Cooking custard for an ice cream base is the only recipe I've needed to switch to a smaller rice cooker for, but I can use my same controller for this purpose.
The overall designs of these systems are all the same. A precise thermostat, usually in the form of a PID controller is used to drive heaters that keep a bath of water at the same temperature, +/- a degree or two. These can be anything from the DIY circulators like mine, to just a temperature controller regulating a large rice cooker, crock pot, etc. Also, the PID controllers used can also be programmed for a cooling setup. I use another identical build to operate a chest freezer that I use as a lagering chest when brewing beer. I can use this controller to operate the freezer at refrigerator temperatures by cycling the compressor on and off bypassing the built in analog thermostat (just make sure to program the PID to give the compressor enough time to rest between cycles) My brother uses one with a thermoelectric cooler to culture his own kefir, a yogurt-like dairy product.
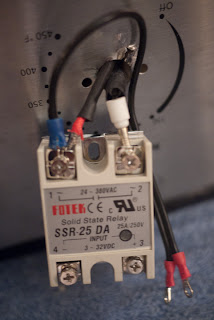
Since building my rig, I've also come across some builds that were downright scary. They are more or less the same design I described, but instead of cases, make heavy use of tape to cover up bare contacts and hold the bare components in place. The tutorials on qandabe advise to only do these builds if you are comfortable working with electricity but I would hope anyone sufficiently comfortable would put a bit more thought into the designs and at least put a case around these components.
Another offender linked from the same site. Heat shrink is used to keep the wires a bit better protected but the metal still looks pretty sharp and too much movement of the relay will wear through that insulation rather quickly. These builds are great proof-of-concept builds. The wiring works and careful use should be safe. A little extra work though could take these builds to the next level.
With a modular build like I use, one could use a roaster such as this and just set the internal thermostat to 450 (a sous vide rig will never get this hot) and just plug into the control box. Building a control box takes a bit more time and effort but is far safer and more versatile. This method also doesn't destroy the appliance you are using. Some arguments for builds like this are that they're cheaper, don't require specialty tools (other than a few common hand tools) and are easy to build. Using a small pelican case for my builds cost an extra $22 for the case and extra costs for connectors, a fuse holder and power switch but the only extra tools I used were a hand drill, file and dremel (though the dremel work could easily be done with a hack saw, file or some sturdy metal snips) but I think the results speak for themselves.


No comments:
Post a Comment